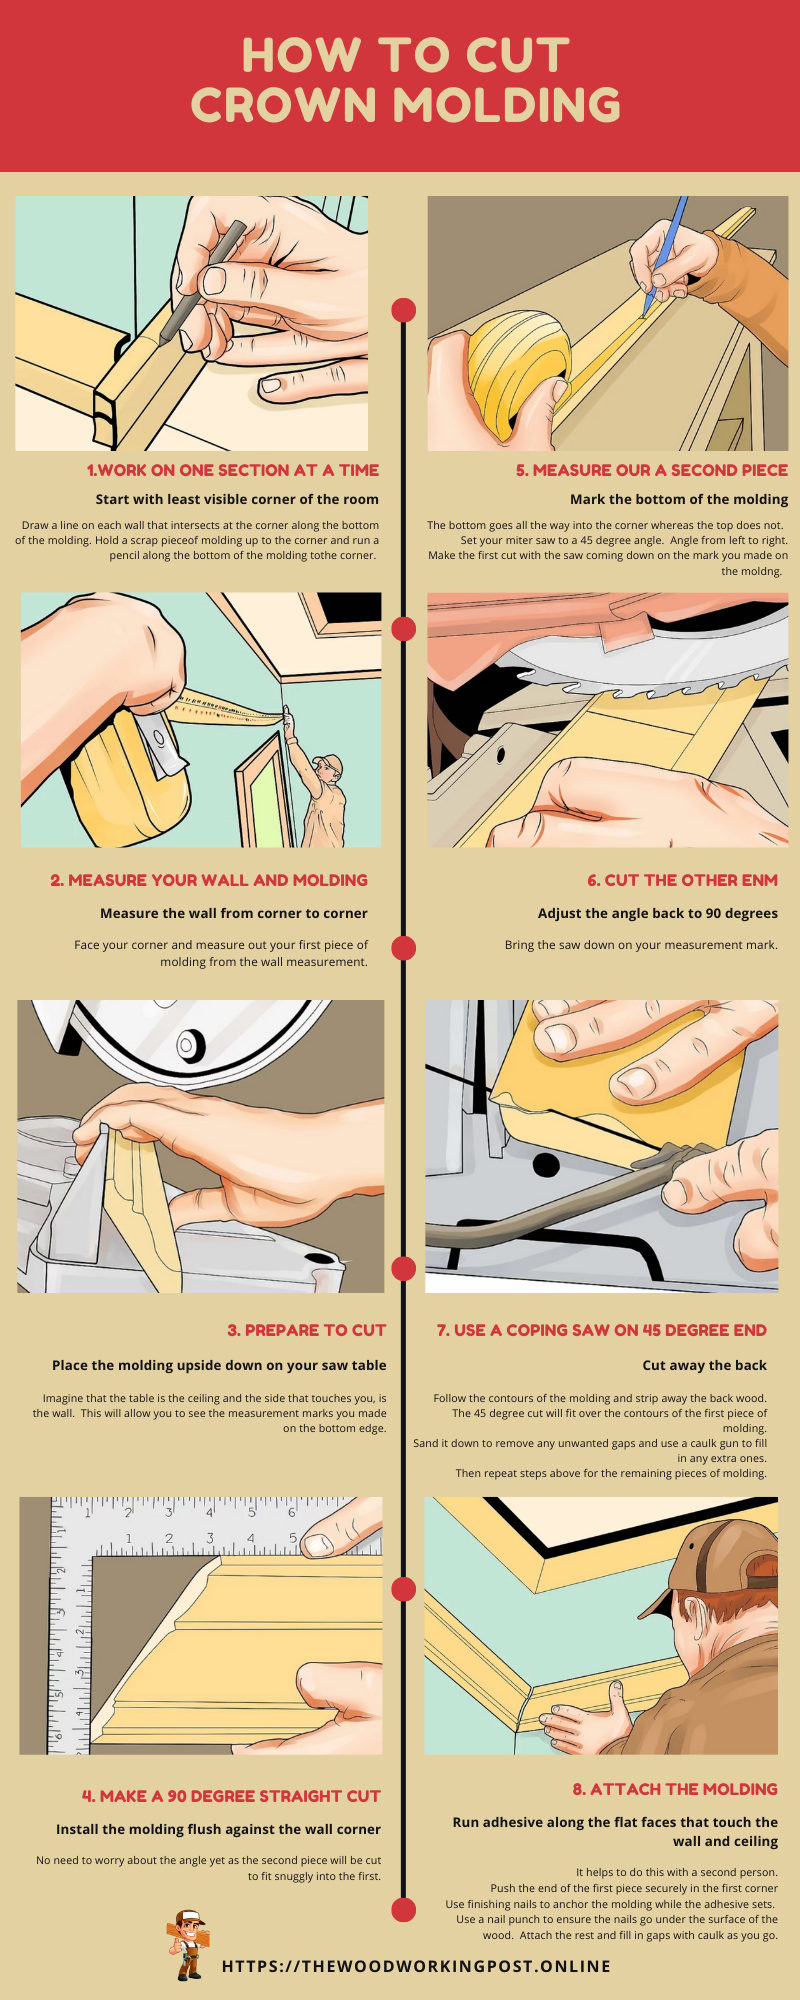
Web crown moulding miter and bevel angle setting chart. Web cutting crown molding flat is an essential skill for anyone looking to enhance their home with elegant architectural details. Visit his roof framing site at www.josephfusco.org. And i’ll always remember the crown chart he prepared and allowed me to publish in my finish carpentry book. In this tutorial, we show you how and give you the angles and bevels to get it right on the first try.
Add crown moulding the easy way! Web a few tips for cutting crown molding with a miter saw: Web in this example we will show you how to cut a 120 degree vaulted up and down crown molding corner for vaulted, angled, cathedral or sloped ceiling. Installing traditional crown moulding requires patience and effort. You must flip the material around to cut both ends of the inside and outside corners.
I’ll always remember him for that. Add crown moulding the easy way! You must flip the material around to cut both ends of the inside and outside corners. Web in this post, i’m sharing how to cut crown molding laying flat using a compound miter saw! Web cutting crown molding flat is an essential skill for anyone looking to enhance their home with elegant architectural details.
Chart For Cutting Crown Molding Flat

Cutting Crown Molding Flat (and how to install it) The Woodworking Post
Crown Molding Cut Chart
:no_upscale()/cdn.vox-cdn.com/uploads/chorus_asset/file/19494106/crown_molding_OverLg.jpg)
Crown Molding Cut Angles Chart
How To Cut Crown Molding Inside Corners With A Miter Saw Next Saw

Cut Crown Molding Flat Chart

Crown Molding Flat Cut Chart
How To Install Interior Crown Molding The Complete Guide To Inside

Angles For Cutting Crown Molding Flat
Crown Molding Angle Cut Chart
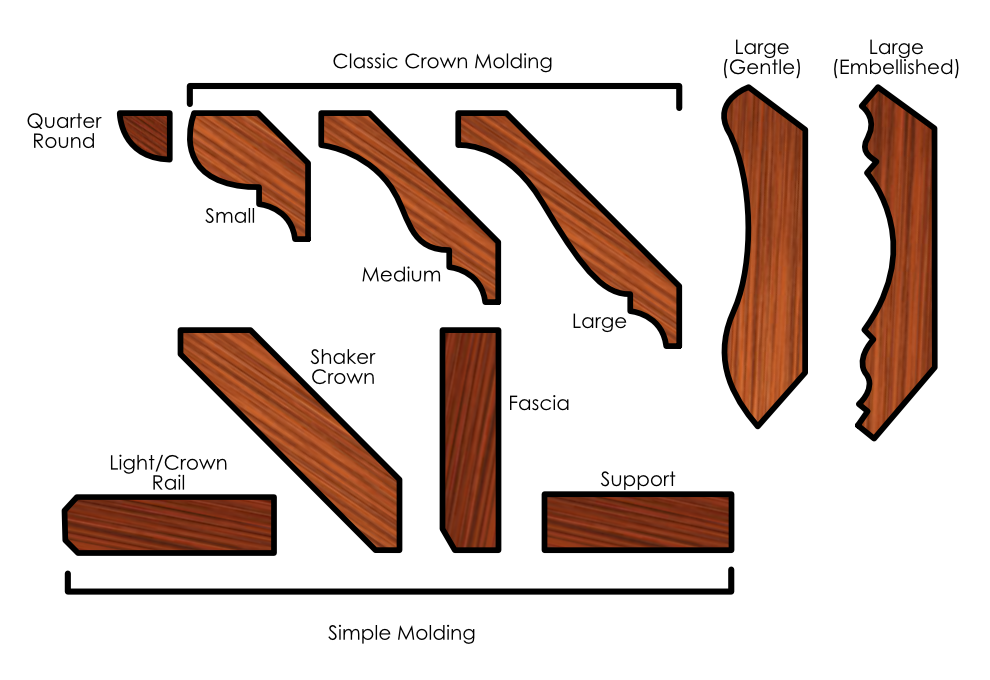
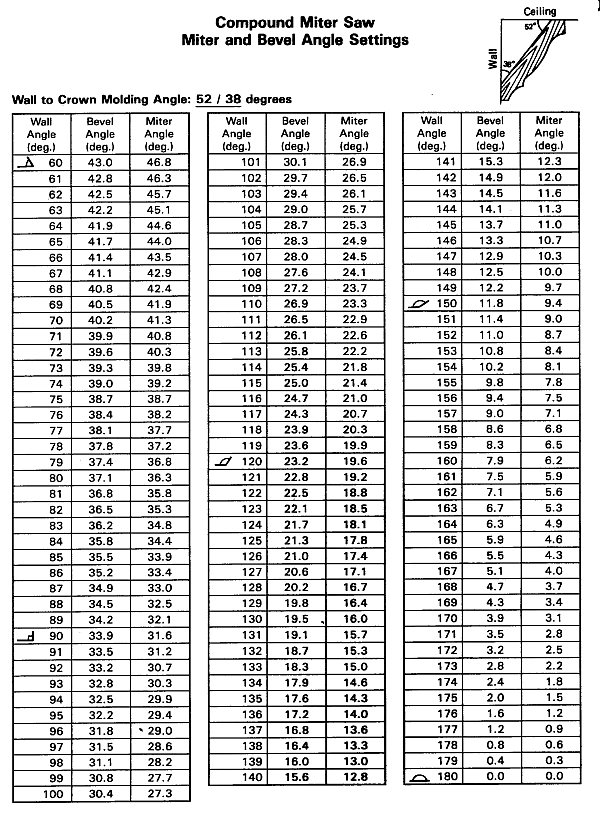
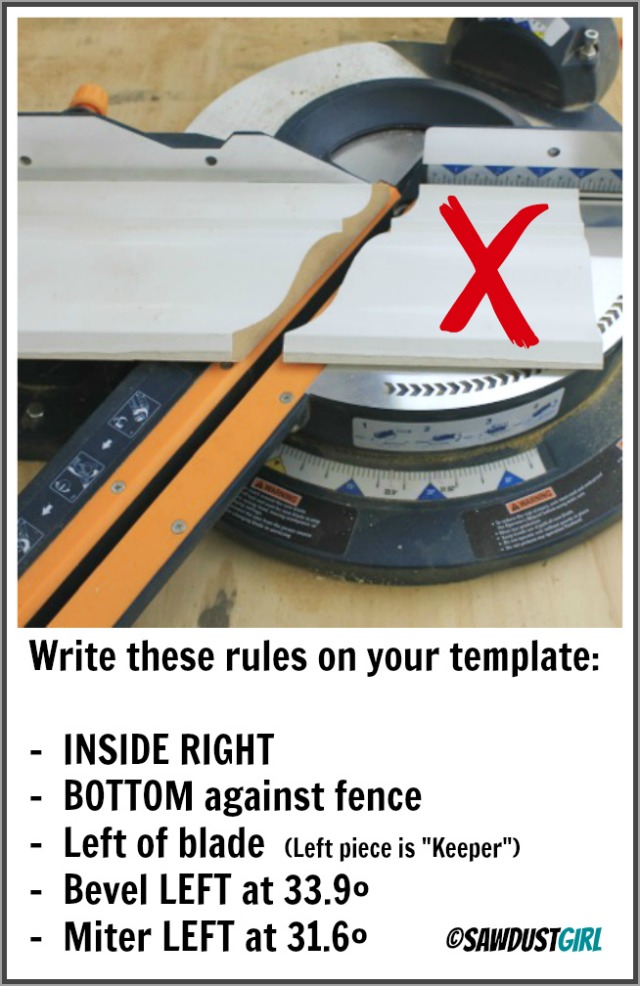
Once again, this adjustment will have a special marking on most saws. August 7, 2008 reprinted with permission from joseph fusco. On most saws, “31.6” is specially marked. Set the bevel to 33.9 degrees. Web cutting crown molding while it lies flat on the mitersaw table allows easy cutting of both long and short pieces; Crown molding is used add a decorative trim where walls meet a ceiling, on the tops of furniture pieces, and even on some window and door trims! So print this chart and carry it in your truck. Just lay the crown in flat arranged for your mitre or cope cut and you're good to go. Web steps for cutting crown molding. Use these samples to check the angles against reality, and to help you visualize the molding in place, when you are standing at the saw trying to remember which way is up. In this tutorial, we show you how and give you the angles and bevels to get it right on the first try. Cut it flat on your saw. Here's a convenient reference for looking up the miter angle and face bevel for cutting and fitting crown moulding. Read on to learn how to cut crown moulding like a professional, as taught by professional carpenter aaron butt in his mt copeland online course coping crown moulding and trim. Lay the crown flat and cut.
You Can Find More Angles In The Cutting Charts Below.
Web place molding in compound miter saw with broad back surface down flat on saw table (visible decorative surface up). See our instructional video page for more information! Once again, this adjustment will have a special marking on most saws. Set the miter angle to 31.6 degrees.
An Unwieldy Piece Can Be Firmly Clamped To The Mitersaw Because It Doesn't Rest At An Angle.
Cut it flat on your saw. Read on to learn how to cut crown moulding like a professional, as taught by professional carpenter aaron butt in his mt copeland online course coping crown moulding and trim. Web joe fusco’s crown chart. Web cutting crown molding flat is an essential skill for anyone looking to enhance their home with elegant architectural details.
So Print This Chart And Carry It In Your Truck.
Our crown moldings cut in most positions in most miter saws. Web a set of crown molding templates give you a visual guide which you can cary around and use to figure out every single corner you have to cut! Web compound miter chart is for cutting all crown molding (regardless of the crown spring angle) using a compound miter saw with the crown molding lying flat and face up. The easiest way to do this is to use a power miter and a coping saw.
If You Have A Wall That Isn't Square (Or 90) You Can Use This As A Guide.
This chart is often needed when installing crown on a cathedral ceiling. Joe fusco taught me how to understand crown molding, especially how to install it on a cathedral ceiling. Flip the material around to cut both ends of the inside and outside corners. You must flip the material around to cut both ends of the inside and outside corners.